Every online business needs content of one type or another. This month we are going to show you how to create content quickly and then reuse it on every platform you want to appear on without spending your entire life on content.
Once you’ve set up your own content process, you’ll see how content can be the key to bringing in new leads, new customers, and new ideas, over and over again.

Step One:
Content for Digital Marketers
What is content?
One of the first questions that we ask new clients is, “What comes to mind when we say the word content?” We get a wide range of answers from videos, blog posts, social media posts, to mailers, newspaper ads, and brochures.
What content means for you depends on the type of business you run. But for most digital entrepreneurs, it’s blog posts, social media posts, videos, graphics, podcasts, and digital ads. Basically, anything that you use to communicate with the world about your business.
At amplifiedNOW, we focus on content marketing. We take clients from strategy to execution, often (but not exclusively) including video.
Our process allows clients to create once and use what they say 27 or more times across multiple platforms.
Because if there is one thing we know, you need to share what you know, over and over and over again, until you’re sick of saying it… and then say it again.
What is digital marketing?
When we talk about digital marketing, we’re talking about two pieces.
First, we’re talking about the content that you put out there. This includes blog posts, videos, podcasts, emails, social media, and everything else. This is your content marketing strategy.
The second part is everything that you do once someone reads, watches, or engages with you in some way, to bring them into your world. That’s the digital marketing part.
When you do it right, you’ll end up with both content marketing and digital marketing. While they are both under the same umbrella, and separating the two can feel like a semantic argument, they both have distinct features that contribute to your overall success.
When you’re thinking about marketing, in general, what you’re trying to do is build a system to get qualified leads. If you need sales today, you need a sales strategy. If you want to set your business up for sales and qualified leads starting months from now and continuing indefinitely, you need a marketing strategy.
Marketing allows you to continue generating new leads while serving your current clients and living life. A marketing strategy that shortens your sales cycle makes it easier for people to raise their hands and move along your buyer’s journey.
What can content marketing do for you?
Basically, what you’re trying to do is put up good, free content and then give the people who see that content out in the wild an opportunity to engage with you further. Typically, that is done by joining your email list.
It’s important to know that your website and your email list are the only two things you own. So if you use a social media platform, you’re at a very real risk of an algorithm change impacting everything.
This is why we encourage entrepreneurs to build a self-hosted sales funnel on a website. A sales funnel brings people in from your freely available content and moves them along the buyer’s journey. We prefer to think of it as a linear path instead of a funnel because it feels gentler and more inclusive.
So your content is what fills your funnel and there are three main types:
- Content that is meant for search engines. Think about the content on a place like Wikipedia or Investopedia, where it’s an extensive content repository that will always outrank just about anybody else.
- Content that is meant to be shared. An example of this would be posts or trends that go viral on social media. Unfortunately, virality can be fickle and hard to depend on, though we’d like everything we publish to go viral.
- Content that moves people along the buyer’s journey. This is the content we primarily focus on at amplifiedNOW. This type of content involves teaching somebody everything they need to know about your business. It could include how to be a good client, take the next step, and explain why it’s important. It is content that shows your potential client why their transformation is necessary and allows you a space to talk about everything you would speak to someone about during your sales process.
You want to make sure you are creating a mix of content types so that you are bringing people in from more than one place, and moving them towards purchasing from you in the future.

Step Two:
Content strategy
Audience and Platform
Audience and platform are essential parts of your strategy. You need to know WHO you’re talking to with every piece of content you create.
When you’re thinking about your audience, remember you probably speak to several different types of people, and your solution probably works for different kinds of people.
One example would be an SAT prep course. You have at least two different audiences you’re selling to—first, the parents who are buying it and then the teenagers who will be using the course.
Each piece of content needs to talk to one type of person. You can’t have one piece of content talk to all people. For example, the parent purchasing the course will be drawn in by different things than the student who will take the course.
So, when you’re creating content, make sure you are alternating who the intended audience is so that you don’t end up only speaking to one facet and neglecting the others.
It’s nice to have a good mix because you’re going to have a completely different tone, depending on who you are trying to reach.
When it comes to the platform, the best plan is to create content for your blog or website and then repurpose it as much as possible.
Mindstorming
Before you start creating any content, you need to create a strategy. Content without a point won’t do anything to help you.
So how do you create a strategy? You hold a Mindstorming session.
Bring together everyone in your business who has a say in content creation. Pick someone to take notes. If it’s just you, find a friend to take notes while you talk. We like to use just a blank Google Doc, but pen and paper work too!
You answer the questions in the Content Strategy Workbook one by one. Spend at least 10 minutes on each question and take notes on everything. This is one of those times where there are no dumb answers. You’ll go through everything later to edit and rearrange.
When you ask the right questions and have the time to answer them, you’ll find that you leave with months of content ideas.
Download the Content Strategy Workbook
Five posts that every site needs
Now, let's talk about the five posts that every site needs. This is from, They Ask You Answer by Marcus Sheridan.
The first one is cost and pricing. Spell out how pricing works in your industry in an easy-to-understand and transparent way. Make it easy for your prospects to know what they’re getting into. If you find that pricing is really hard to find on your competitors' sites, being transparent about how your pricing is set up will help you stand out from the rest. Even if your pricing depends on a number of factors, make that clear. And tell them what the various factors are. Give a ballpark estimate, or a “packages start at” line.
The second is the problems that the prospects are having and problems with the solution. Your offer is not for everybody, use that angle to really build credibility. Reinforcing that the solution isn't right for some of the people in the world will only go to reinforce that it is right for YOUR people. Here’s an example from Zendesk.
Third is comparison, so your offer versus another offer. Make sure this is honest. This is not politics where the comparison is good versus evil. This is an honest listing of benefits. And yes, there's a way to do this that will show you at the top, but it will also depend on what people are optimizing for. Zapier has a good example about course hosting platforms.
Fourth, best-of lists. The best competitors. The best examples of a product or service. The best in class, best practices you can check. Here is a good example from Impact.
Lastly, you can do reviews. Reviews or testimonials from your clients or your previous clients. Here is a great example from Alison Reeves.
These are the “big 5.” They generate more traffic, leads, and sales than any other type of post.
Content pillars
After you have finished your Mindstorming session, you are most likely going to be tired. Mindstorming is an exercise that burns calories.
We tend to like doing Mindstorming sessions at the end of the day because your inner critic tends to be quieter.
After you’re finished Mindstorming, let it rest for about 24 hours. Then, with your notes, watch the session again. See if you missed anything. Then start organizing your content into pillars.
Typically, these content pillars will come naturally. You’ll probably see four or five different themes start reoccurring. You’ll start seeing patterns with the topics that you create.
It’s cool because you don’t have to spend time thinking about it. If you had tried to focus on the themes first, organizing ideas into pillars would be a lot harder. Letting those themes come out naturally still allows you to have structure, but it’s a lot more organic.
Once you have your themes, you can start the refining process. Usually, when we're working with clients, we tell them to take those themes and think about what sort of topic they can create within those themes.
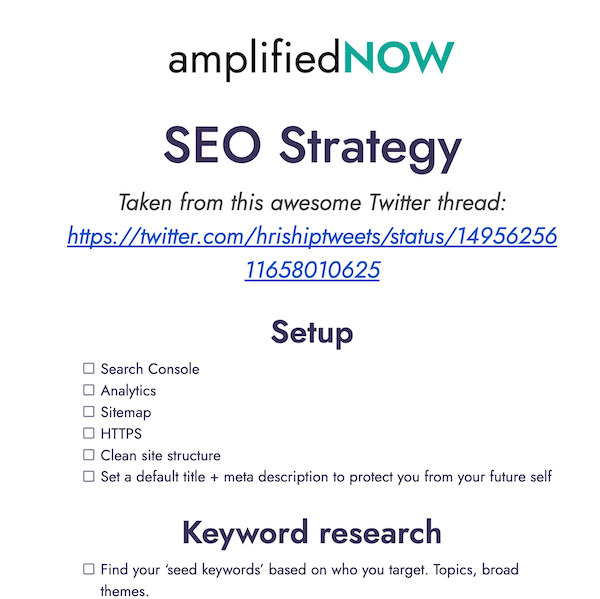
When you’re creating these themes, you’re not thinking about keywords. But since you’re taking a strategic approach, what you can do is then run these themes through a keyword research tool of your choice and see where you should be creating content.
Repurpose Content
Step Three:
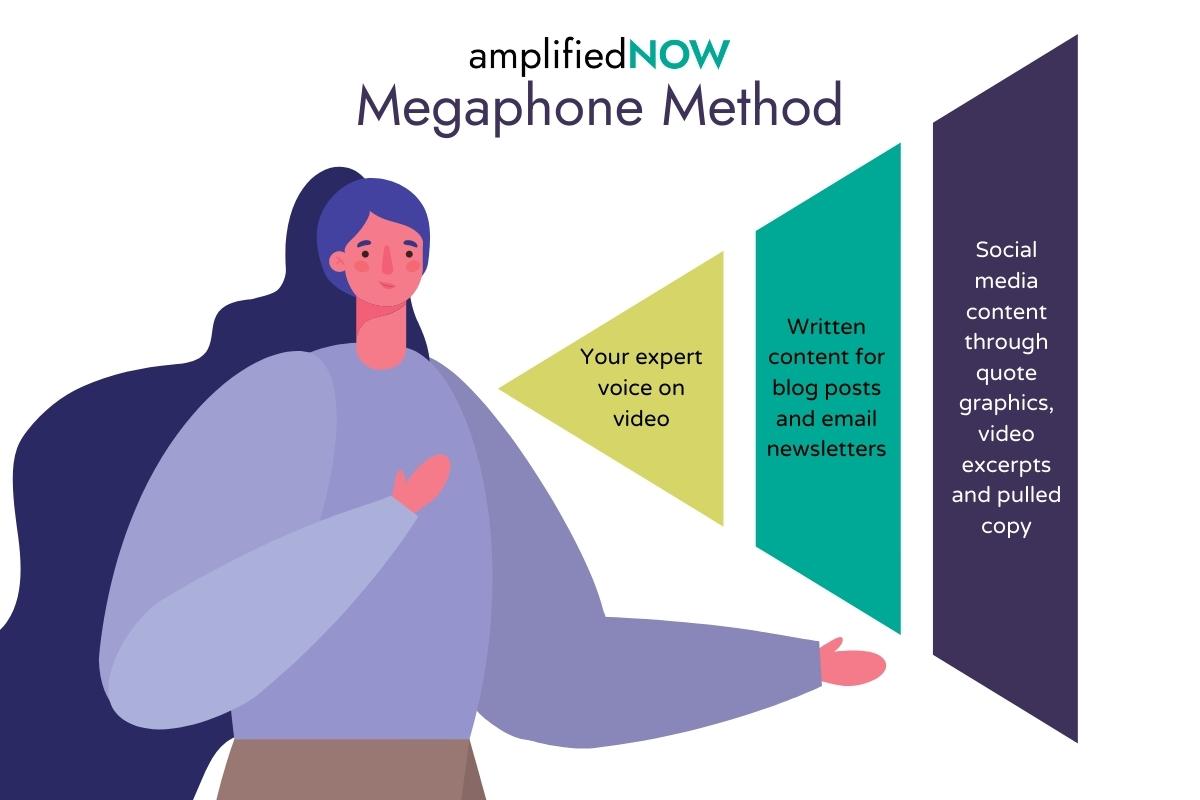
The Megaphone Method
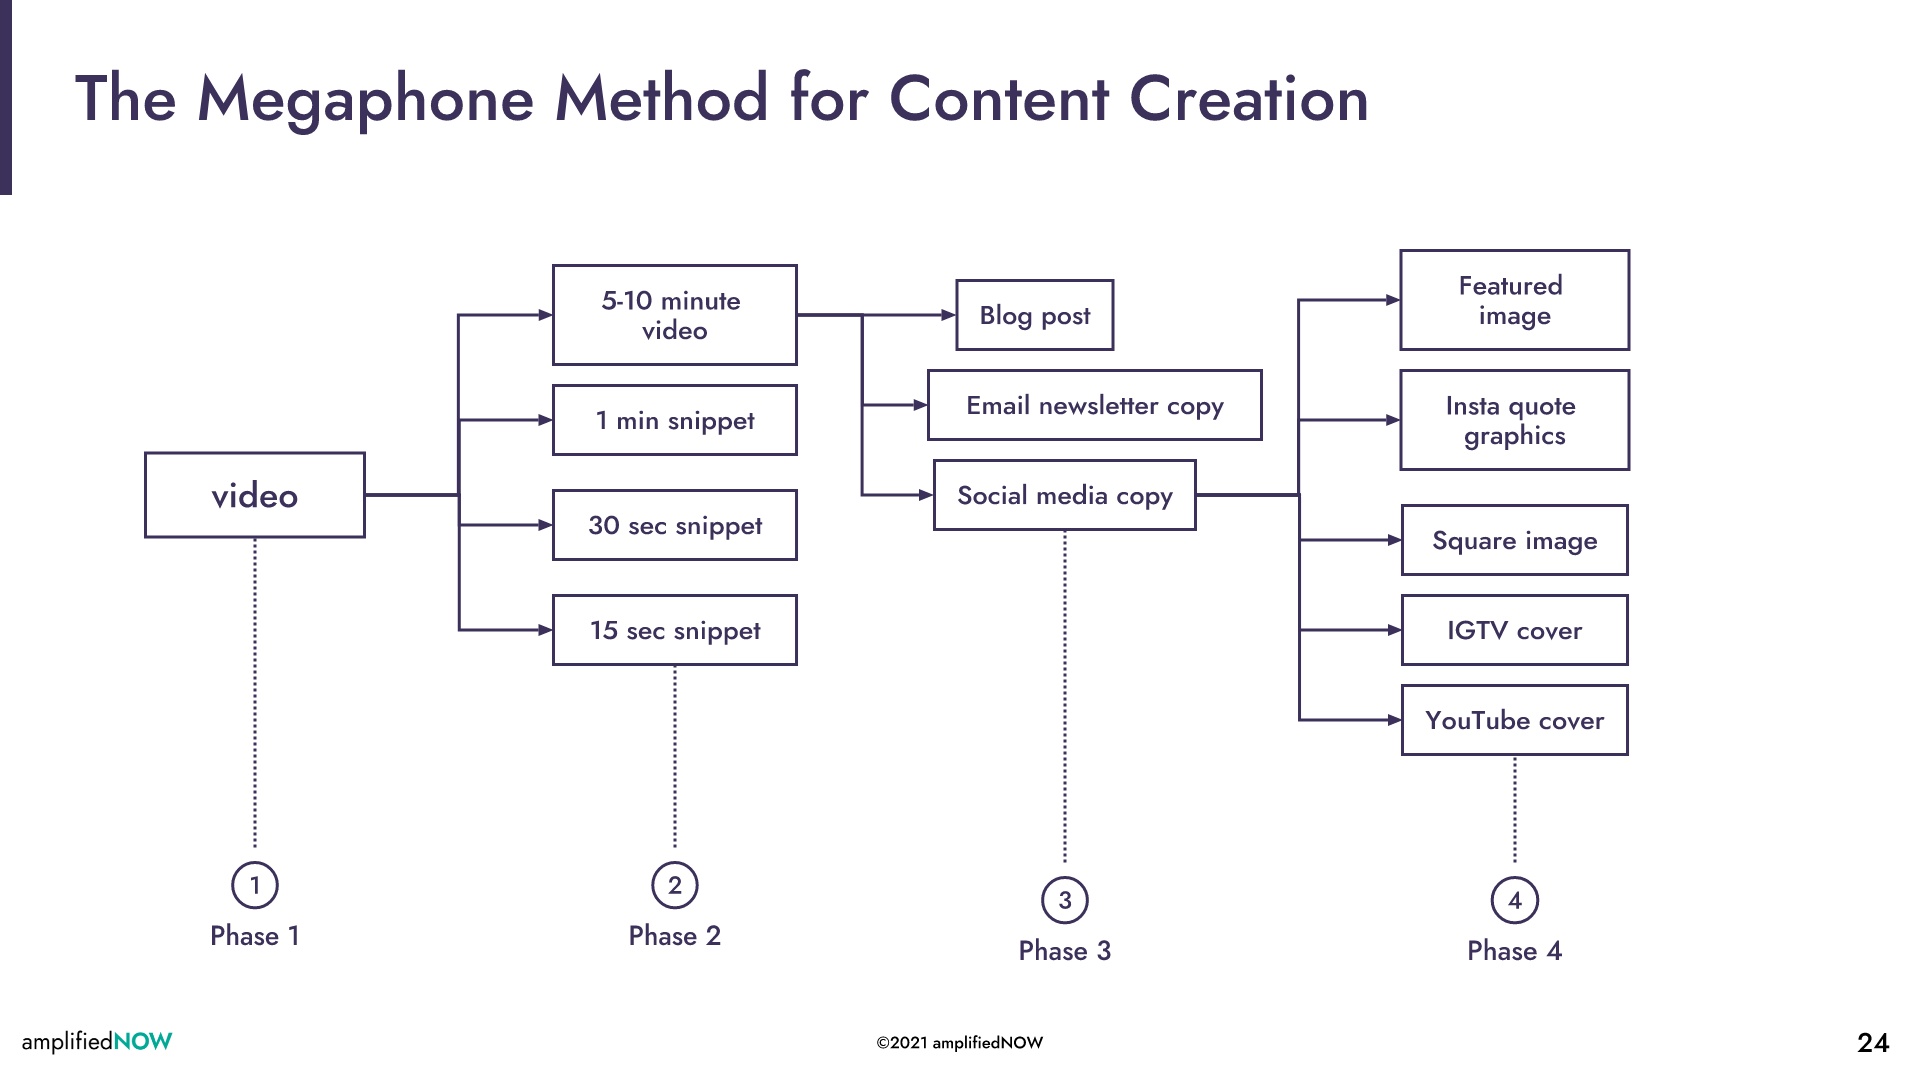
Our entire process starts with video. Even when we don’t use the finished video in our content, we generally start by hitting the “record” button. Here’s our process.
Step 1. Hit record and talk for 5-10 minutes.
Film a five to ten-minute video focusing on one topic. Tell a story. Make a point. End with a call to action.
Step 2. Create transcript, cut for different aspect ratios, and repurpose.
The transcript of the video gets edited into a blog post, email newsletter, and social media copy. Then you create graphics for thumbnails, featured images, and social media. Suddenly, your single video has created enough content for every platform.
The full-length, landscape video gets uploaded to YouTube. When you fill in the description, make sure you have your keyword and a link there that goes back to your website. You want to take people from YouTube, or wherever else, to your sales process to enter your buying journey.
You post the blog post on your website and embed the YouTube video to encourage people to stay on your website and watch the video.
Then, you take the full-length, portrait video and add that to IGTV.
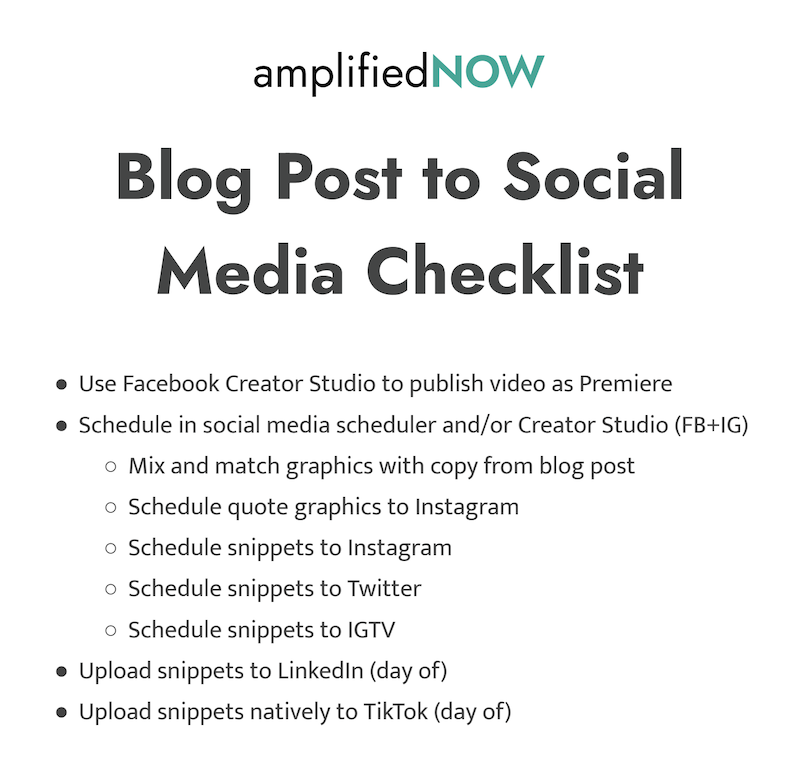
Next, you want to take your 15, 30, and 60-second snippets and add them to Instagram Feed and/or Stories, Twitter, LinkedIn and Tik Tok.
You can also use your graphics and social media copy to post to Twitter, LinkedIn, and Facebook.
Don’t post everywhere on the same day. Spread it out so that your words have a timeline and your thoughts can be dripped out to reach the maximum number of people.

Step Four:
Content structure
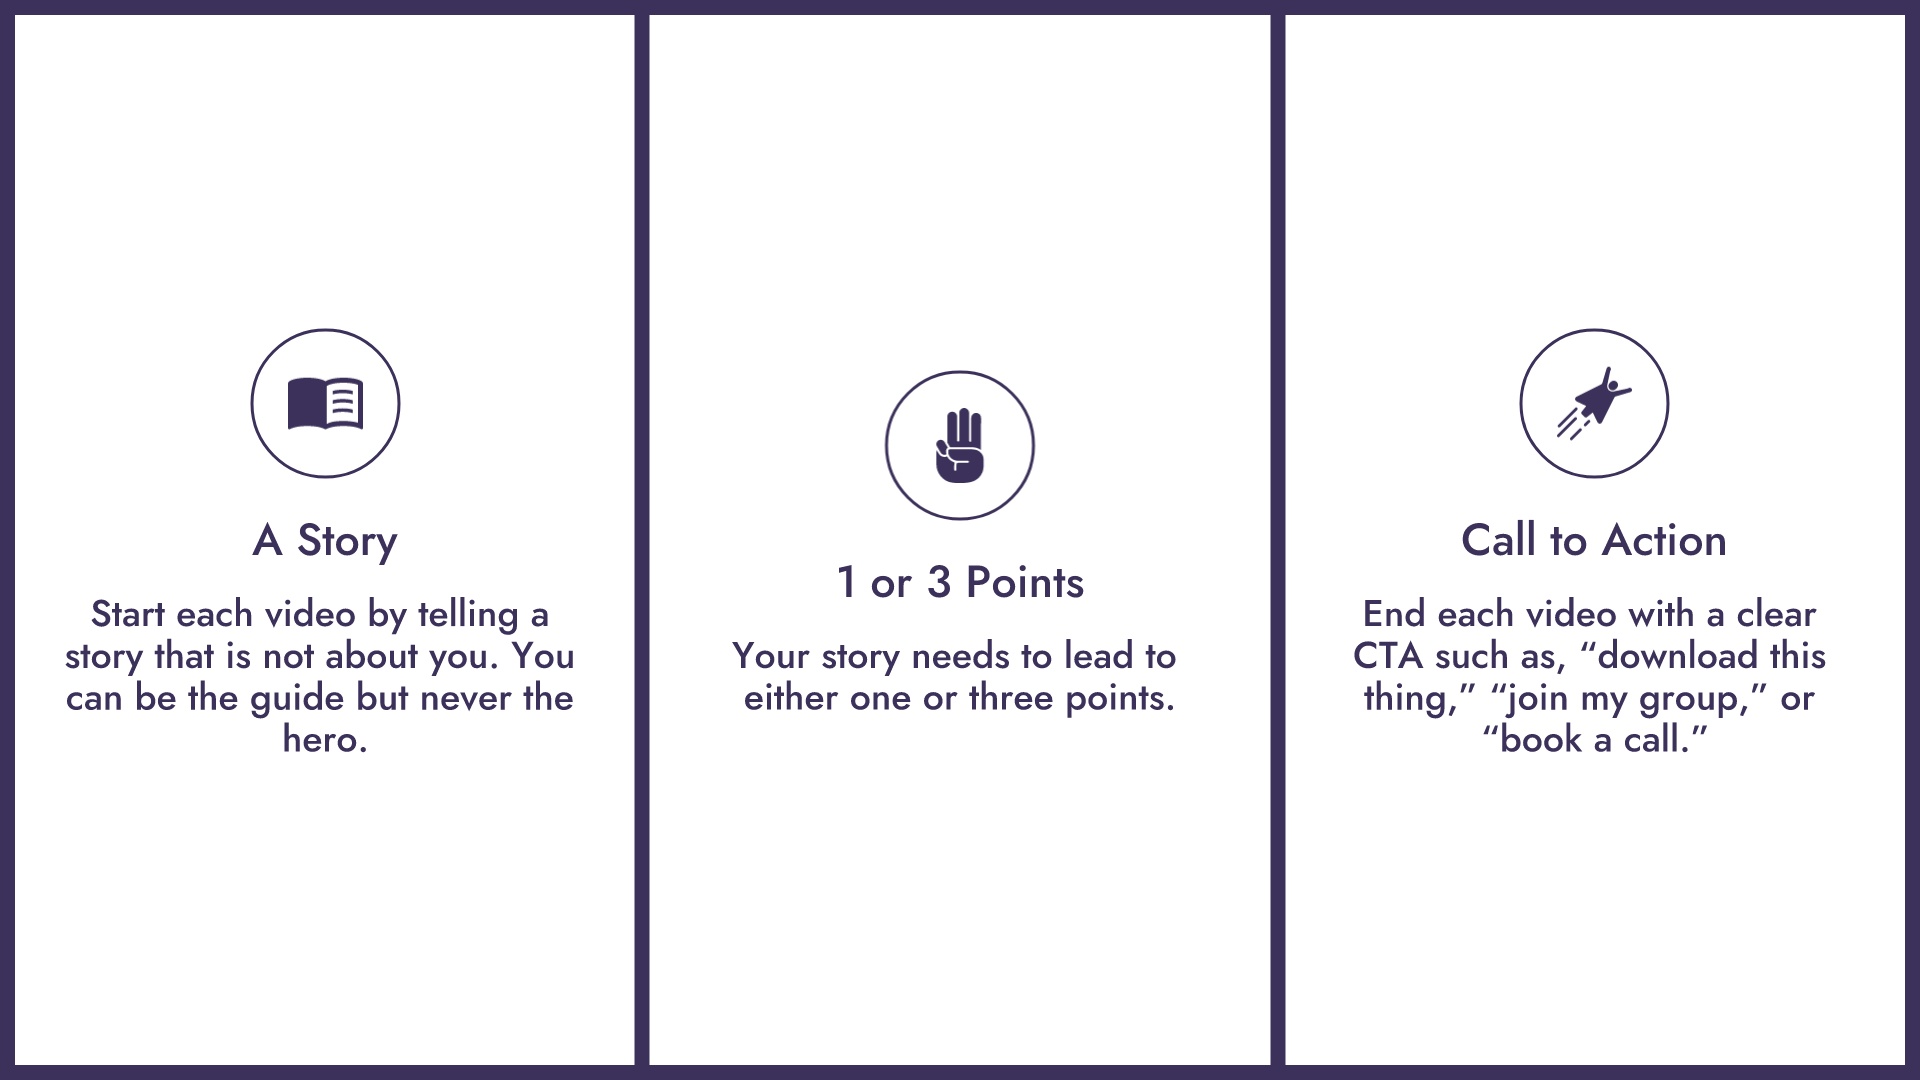
Each video (or blog post) should contain three things.
The story
Storytelling is at the heart of marketing. Every good piece of content has a story in it.
For every story you tell, be sure you’re doing a couple of things.
The first is allowing someone to imagine themselves as that person in your story. Paint a picture that lays out specifics. Now somebody else in a similar situation can see how your solution can work for them.
If you think about some of the most prolific content creators out there, they tell a whole bunch of different stories, but they all have very similar points.
Don’t let the story trip you up. Allow yourself to tell stories about clients past and current. Make sure you anonymize key details but paint a picture.
A connection that scales focuses on the transformation.
In these stories, you’re not the hero, you’re the guide, you are the trusted adviser, you are the catalyst for their transformation.
Get the idea across through your stories that you have helped people who used to be really confused, and they came to you, and now everything is clear. They used to be in a pre-transformed state, and they’ve come to you, and now they are transformed, and their lives are better.
Tell stories over and over and over again. That is the absolute best way to get a ton of content out there.
It also makes every interaction more meaningful because you may have the nugget for your next piece of content. The story is so important.
We had a client tell me that they finally bought into the idea of storytelling, but had the takeaway backwards. They thought they had to find good gems in their own past. They then went through somebody’s very expensive program about getting super radically vulnerable and comfortable talking about their own story.
We wish they had come to us first. If you want to do that kind of introspective work for your personal growth and interactions, that is great.
However, as an expert, as a thought leader, as a consultant, coach, or a business that helps people move the needle, your personal story hardly matters. You want to keep your personal story of why you founded your company or your personal journey on your “about page.”
What truly matters is getting your next potential client to imagine themselves working with you. If they can see someone else who was like them, now transformed, they’re so much more likely to become a client. So that’s what you need to think about when you think about telling stories.
The main point
After you’ve told your story, make sure you tell your viewer your main points. You can have just one, or you can have three. If you have two, it can feel like an unclosed loop, and if you have more than three, that’s hard to remember, both for you as the creator and for your audience.
Ask yourself, what is one thing that you want somebody to take away from your piece of content? You’ll know what that should be from the Mindstorming session and the keywords that you’re trying to build content around.
Help your viewer connect with your story, and after they see themselves in it, help them know the next steps you want them to take. These main points are the skeleton of any piece of content. The story at the beginning and the call to action at the end are the things that make it unique and exciting, but your main points give your content structure and clarity about how to move forward.
This is also, crucially, where the title of your piece comes from.
A Call To Action
The call to action is the ending to your content, and it’s very important. It is the piece that is going to prompt your viewer to take action, such as booking a call or downloading a PDF.
If you don’t have an opt-in or haven’t done a new opt-in in a long time, don’t let it stop you from creating content.
We’ll get to some of our favorite opt-ins in a future playbook. But don’t let your lack of a PDF, an on-demand webinar, or a quiz keep you from creating content in the first place.
It is a two-lane approach. You have a car in this lane, driving the content, and a car in the other lane with the digital strategy.
You can always add an opt-in later. When you’re starting and don’t have an opt-in, what you want to do is just send people to a free consultation.
In your call to action at the end, spell out exactly the action you want them to take. You’ll see from some creators who are not platform agnostic they ask their viewers to click the subscribe or like button. You don’t want any of that. You’re not dealing in subscribers or likes. You are dealing with clients and customers.
Whatever opt-in you choose, make sure that you’re connecting your main point to your call to action every single time. If you don’t tell somebody what you want them to do at the end of the video, they’re not going to do anything.

Step Five:
Content creation
Why video?
Once you have your themes and topics, it’s time to film.
You may be asking why video? In our experience, it’s the easiest and fastest way to create content.
One of the best reasons to use video, other than making your writing easier, is that it increases the “know, like and trust” factor with your audience. Not only will you end up with a piece of content that answers all their questions on a topic, but you’ll be showing up personally via the video embedded in the post so they’ll get to know you.
Video also takes away the “blank page syndrome” that stops many people from writing. It’s easier to get your ideas out when you are speaking for most people.
Now, we love to use these videos as part of the entire content process. We edit them for YouTube and cut them up for social media platforms. But, you don’t have to do any of that, especially at first. Simply start with a video and then use the transcript as a first draft for your blog post.
Once you feel more comfortable on film, you can include the videos themselves in your strategy.
How to feel comfortable on video
One of the first questions you might ask is whether or not you need a script. As much as we would like just to say no, and hope that you trust us and move on, we’ll explain a little more.
Unless you are a trained actor, when you read a script on camera, it looks and sounds like you are reading a script. You sound wooden, you sound nervous, you seem anxious, and you are not putting your best self out there.
Now, if you are a trained actor, ignore the above paragraph and do whatever works best for you.
But most people marketing their own businesses online are experts, authorities, leaders in their field, and if you fall into one of those categories, remember that you are someone whose thoughts about your industry should be recorded for the common good.
Channel that mindset when creating content. Map out ideas of what you’re going to say, but not to the point where you want to look at your notes or read something verbatim.
What you’re trying to do with these videos is to speak and stand in your authority for at least five and up to ten minutes. You don’t need a script. Shoot from the hip and show your prospects and your clients that you know your stuff.
Here are a few tips to help you increase your comfort level on video:
- Don’t do your own editing. Instead, find an editor you trust so you don’t spend all your time obsessing about something only you will notice.
- Find someone to interview you. We love to do this for our clients because it changes their mindset. When they have to speak to themselves, they get deer-in-the-headlights and their brain tricks them into thinking they’re on a huge stage. They think they need to sound like a professional speaker and look like a movie star. We find that interview-style breaks down some of the barriers, and they feel more comfortable with a question-answer format.
- Dress for confidence. My mother worked in a male-dominated field and she had this one red power blazer she would wear when she was negotiating. So, if you have a talisman, whether it’s a pair of shoes, a piece of jewelry, or a shirt that makes you feel more confident, then, by all means, wear it. When you feel like you’re put together, you will behave more comfortably on video.
- Hit record and don’t stop! Because you have a trusted editor, let them cut out the parts where you start and stop and make it flow smoothly. It takes more energy to stop and start than to just keep going. Trust your editor, trust the process.
Hardware we recommend
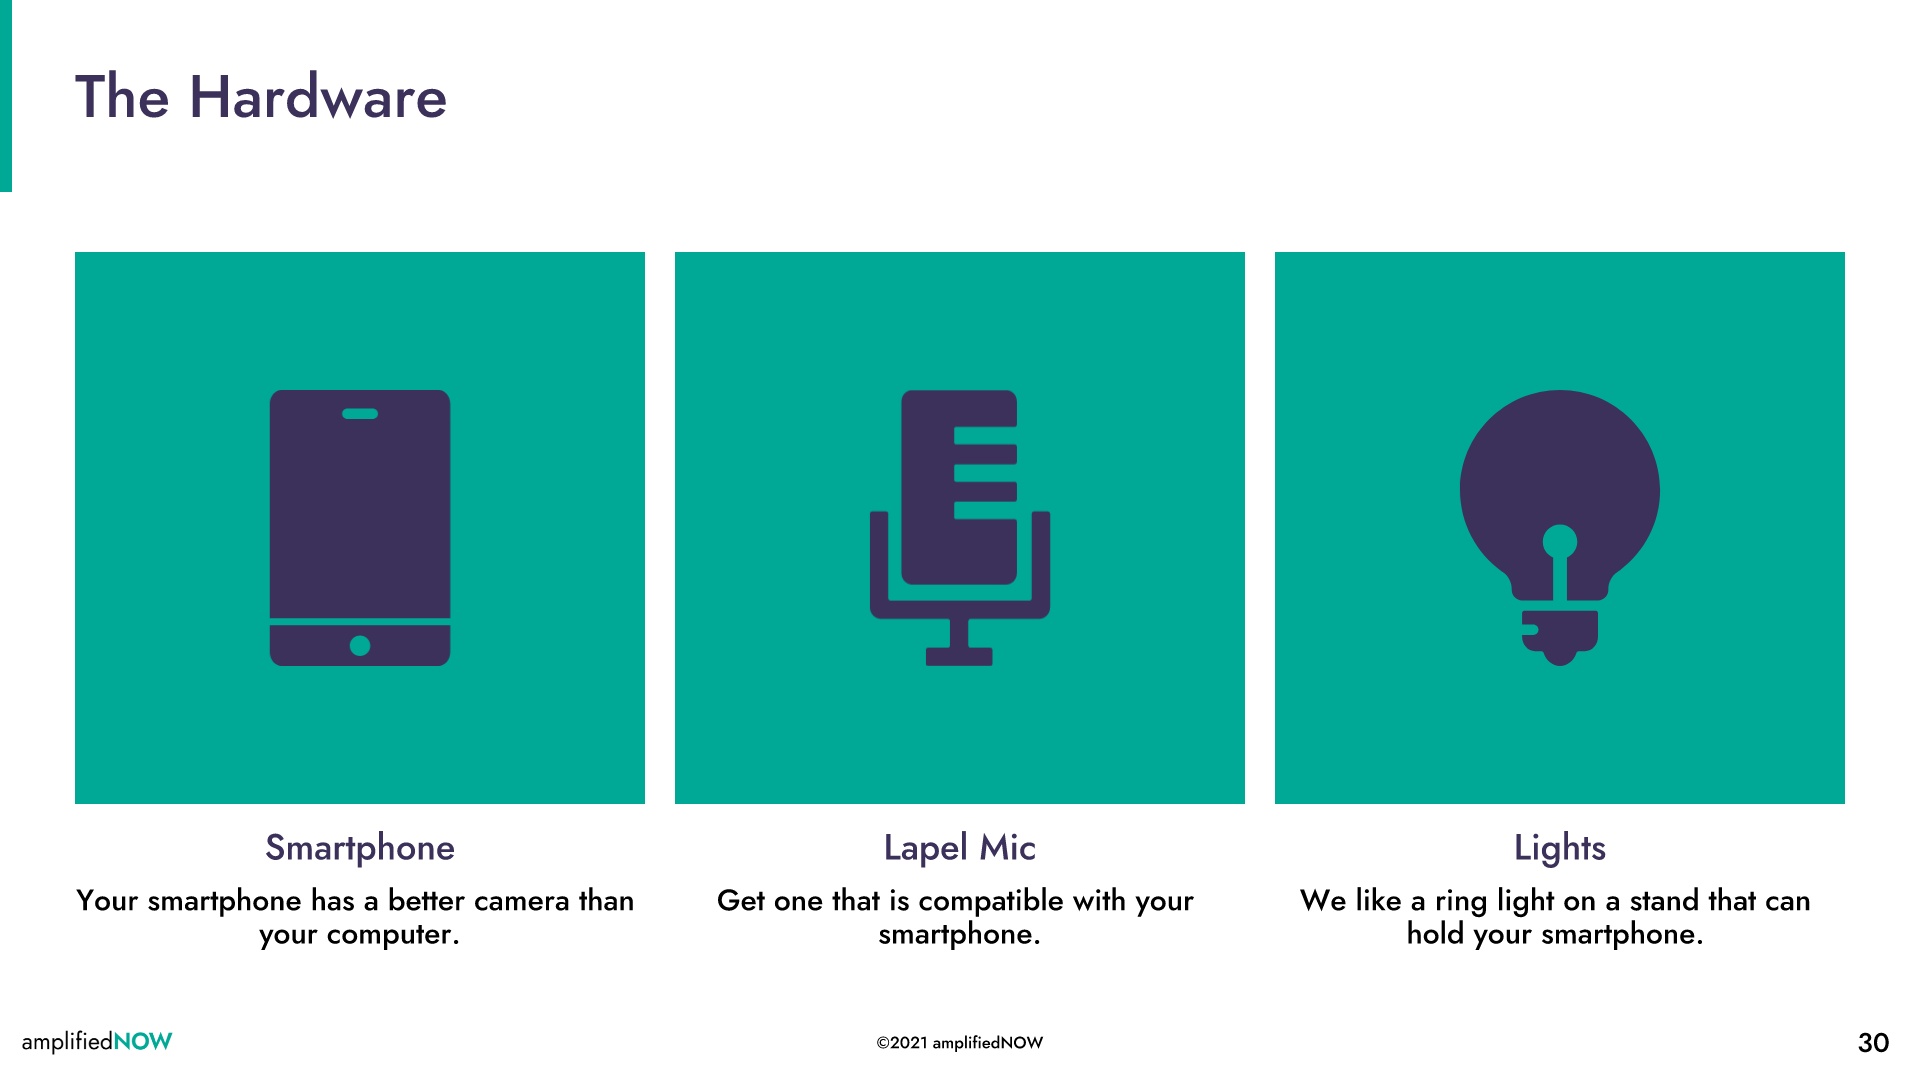
You don’t need to spend a ton of money to get set up to film.
If you’ve purchased a smartphone in the last three years, it’s probably got a pretty good camera. You don’t need to go out and spend thousands of dollars on a video camera, your phone will do just fine.
Get an external mic to make sure your sound quality is good. You can get a lapel mic that plugs into your phone or uses Bluetooth to connect.
Lighting is the most important thing you’ll purchase. Get yourself a good ring light. The kind that also works as a tripod to hold your phone is a great sub-$100 investment. Depending on the lighting in the room you’re using you might need two lights but you can also take advantage of windows and lamps to balance the lighting.
If you don’t have a clean, simple background for your videos, you can get a green screen and then use a stock photo to fill in for the background. But a neat bookshelf, plain wall, or even curtains can work just fine.

Step Six:
Content repurposing
Software we recommend
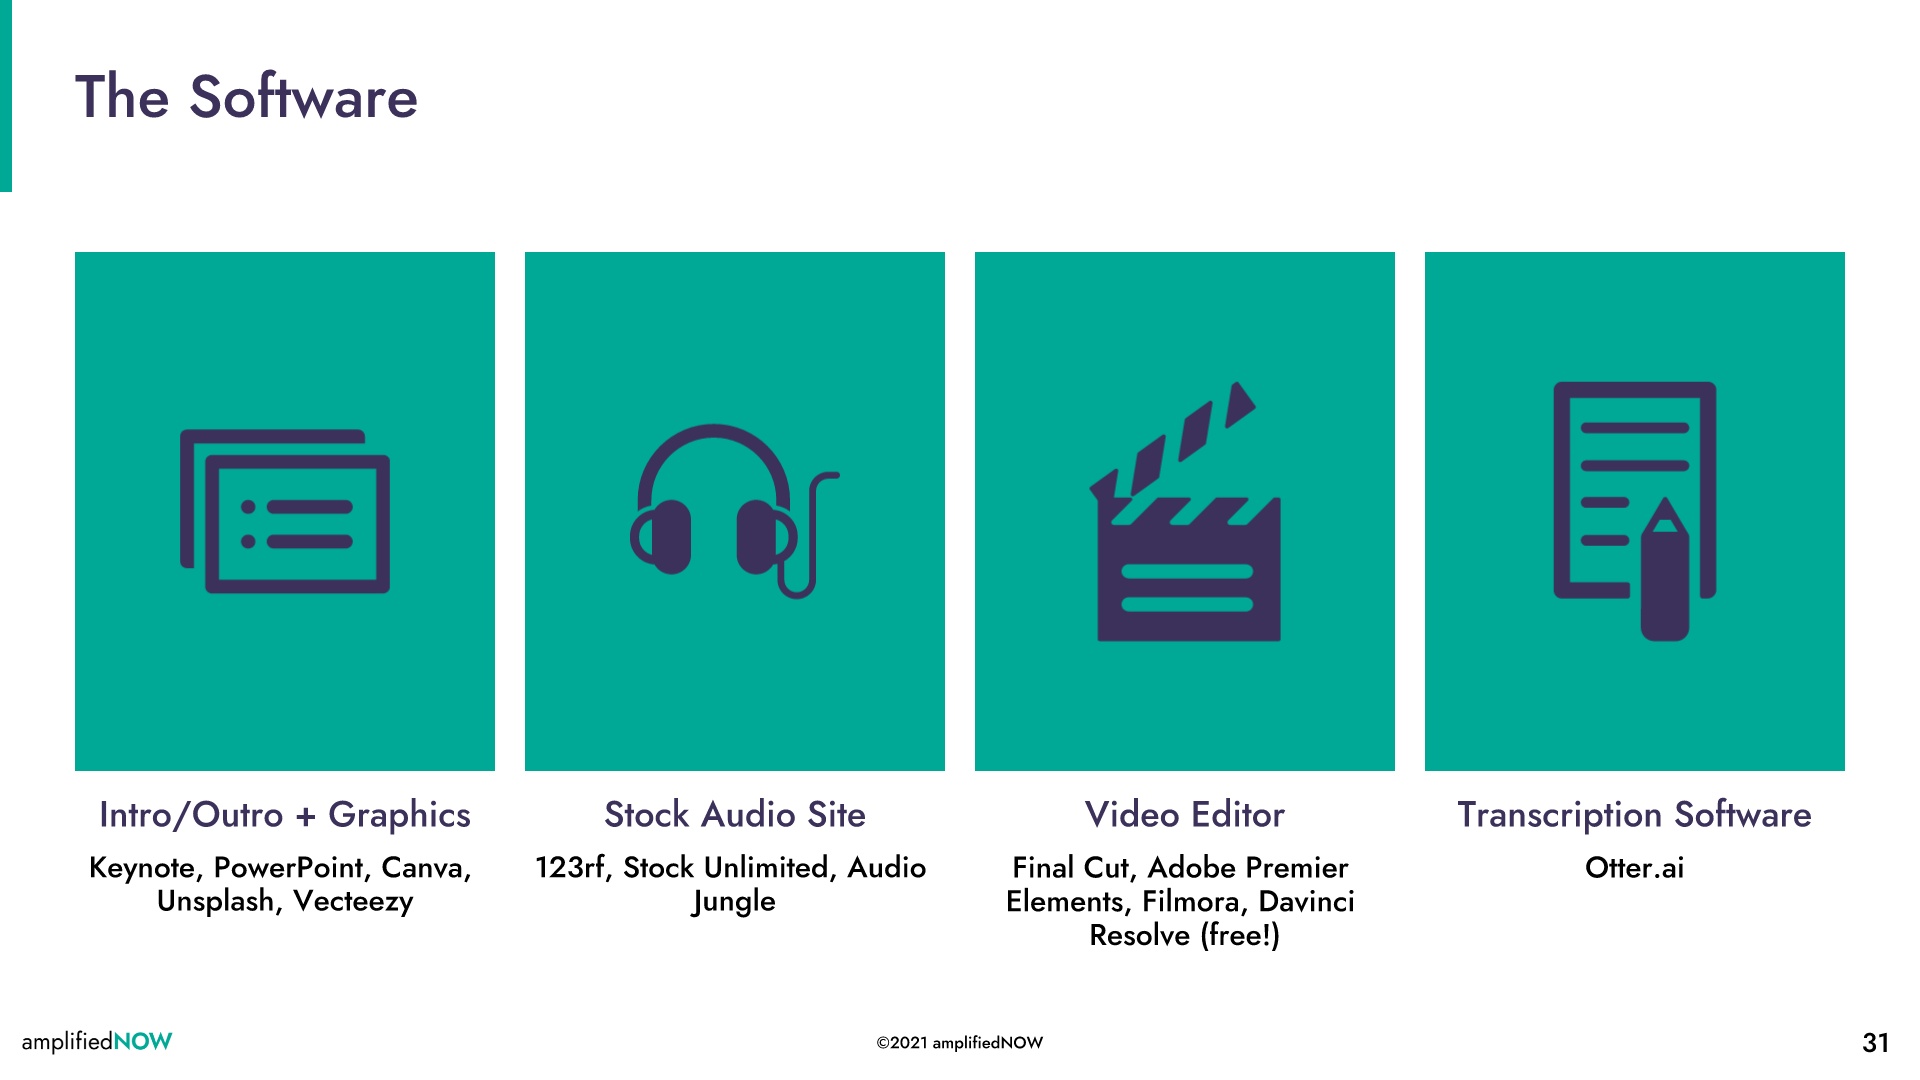
Software is another place that you might think you need to spend money. There are so many free or low-cost software options available though that it will probably cost you less than you think.
Graphics
We use Canva most often, but you can use Keynote or Powerpoint to create intros and outros, and different size graphics. Canva has stock photos included but if you want to find other free ones use Pexels or Unsplash.
Audio
There are many places to get music for your videos, 123rf, Stock Unlimited, and Audiojungle are just a few. Some have free options, but even purchasing music can be as cheap as $5 per song.
Video Editors
There are a ton of different editors out there but if we were going to recommend one, it would be Davinci Resolve. It’s FREE (!!!) and amazing. It will do everything you need to make your videos look super professional and the learning curve isn’t very steep.
Transcription
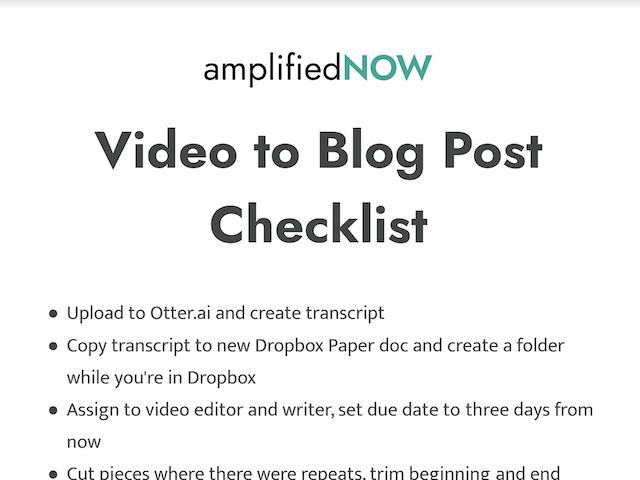
We use Otter.ai for all of our transcription needs. It’s affordable, learns your “voice” and makes editing easy. You can download the transcription as an SRT file to upload to YouTube for captions, or as a text document for creating your blog post.
Video editing basics
The first video, the one you'll use the most, is your 16:9 (1920x1080). That's the one you'll upload to YouTube, embed in your blog post, and generally link back to.
The numbers don't lie: people watch videos on mute. All. the. Time. You want to make sure to upload the SRT file to YouTube and Facebook. You can also hard burn the captions onto the video, but screen readers won't read them that way so they are not as accessible.
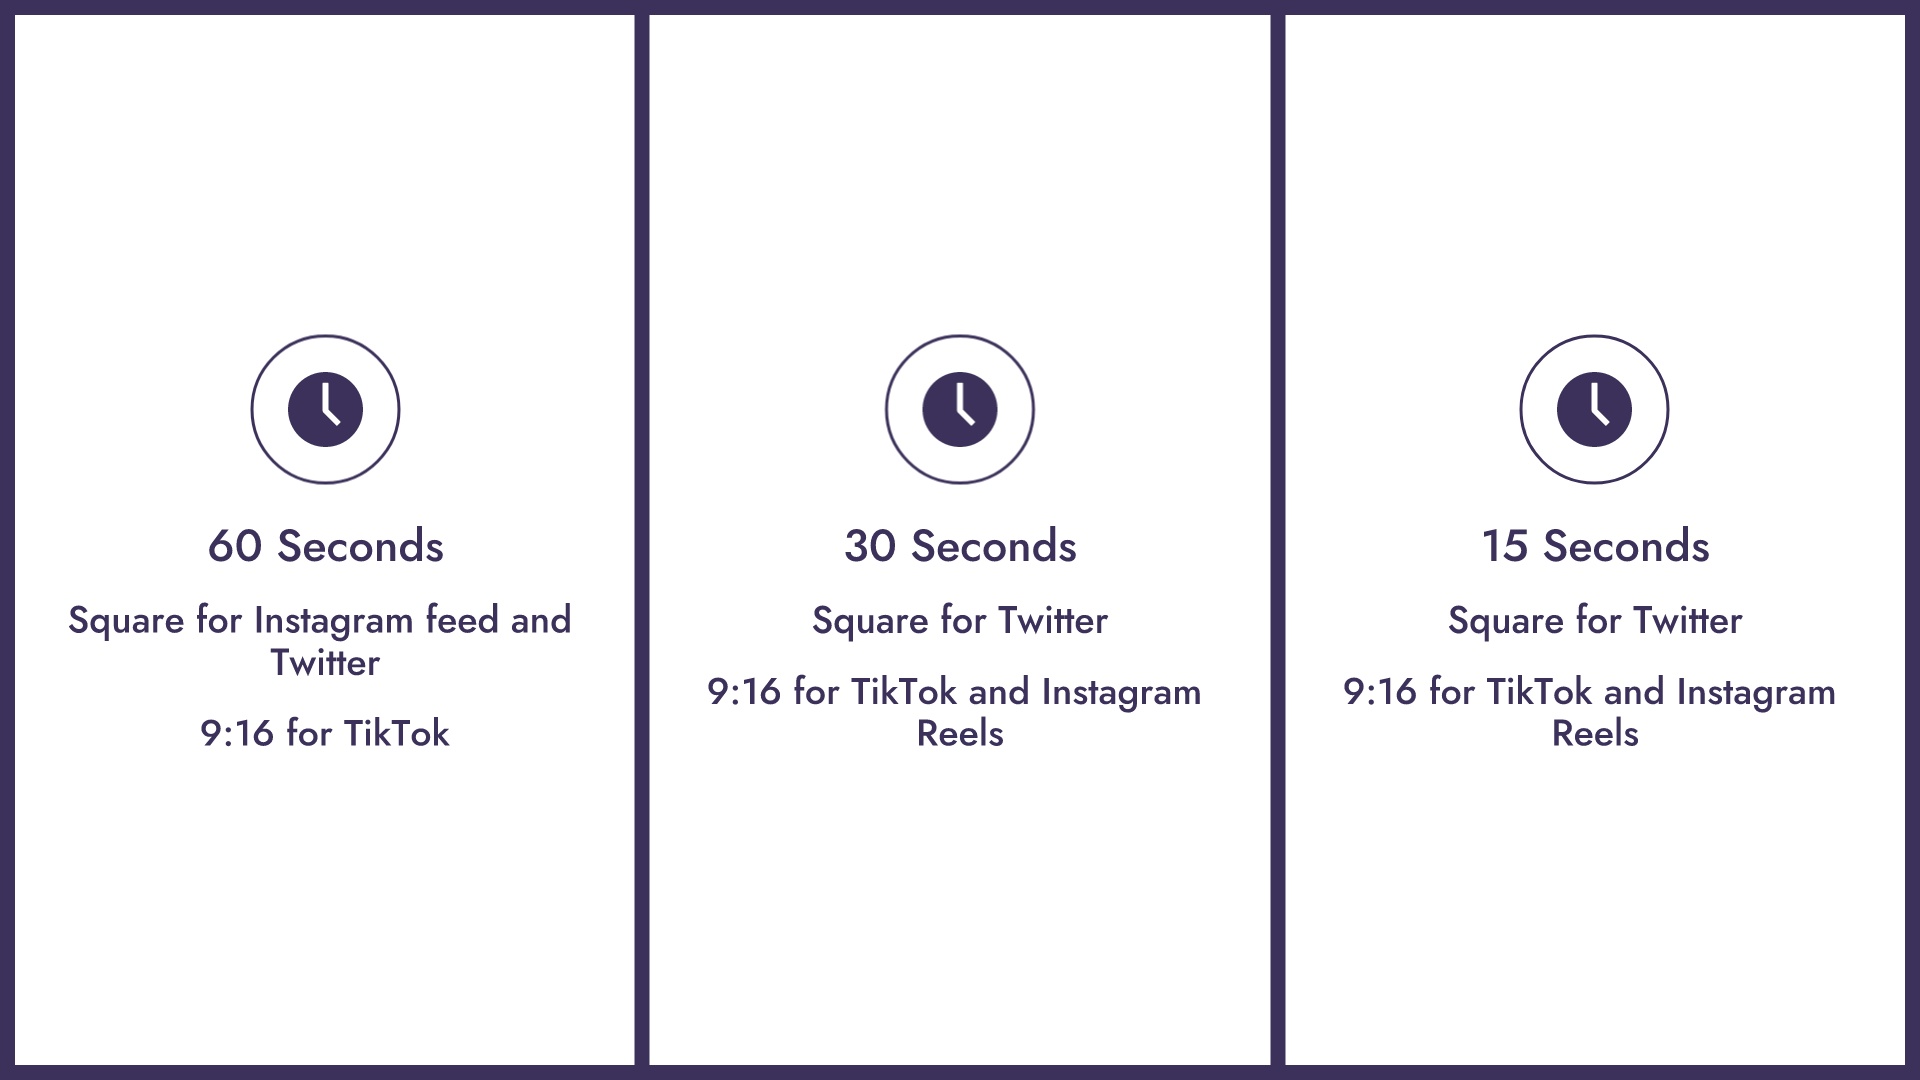
Once your full-length video is edited, you can then resize it for IGTV. After that, cut snippets that cover a full thought and size them for Instagram Feed (1:1) or Stories and TikTok (9:16).
Here are some of the most helpful videos for learning how to use Davinci Resolve:
Mastering micro-content
In the past when we thought of creating video content, it was usually only long-form videos for use on YouTube, Instagram, or Facebook Live. But, with the rise of social media and dwindling attention spans, we have seen an increase in micro-content.
Microcontent is any written or video content that can be consumed in 60 seconds or less. It takes your message and distills it down into a very short segment that leaves an impression on your viewer.
The main platforms we are currently seeing for video micro-content are Instagram Reels and TikTok. These videos are usually 15 or 30 seconds, so this will probably be much shorter than you are used to creating. It may seem like a waste of your time to create something this short. You probably feel like there is no way you can get your message across in under 30 seconds, but before you dismiss it, let’s discuss how micro-content can benefit you.
Micro-content can be very helpful to reach your audience – both your current fans and new clients- in a way that attracts their attention.
According to Digital Information World, the average human attention span is now shorter than a goldfish’s. In the year 2000, before the rise of smartphones and social media, the average attention span was 12 seconds. Now it is clocking in at eight seconds. In comparison, scientists believe that goldfish have an attention span of nine seconds.
You can see how important it is to capture your audience quickly and in an engaging way. But, don’t let this intimidate you. As important as micro-content can be, it is not a replacement for long-form content.
While micro-content can answer questions and show a preview of what you have to offer, when done correctly, it should lead your viewers to a place where they can learn more about you or your products or services. It can help you create and grow a follower base that is interested in what you have to say, and create an opportunity for deeper conversations to occur.
Cutting up videos you already have created into micro-sized pieces of 15 or 30 second sound bites for use on TikTok or Instagram, allows you to reach a whole new audience without having to create anything new.
Remember, the purpose of micro-content is to take the first step in introducing yourself to your target audience and to give people the chance to get a taste of what you’re about. It’s about beginning a relationship that will allow you to funnel them to where you can explain your entire message and create a lasting connection.
Remember the micro-content should include a full thought. So when cutting down a video, make sure each snippet you cut makes sense as stand-alone content. It can be part of a larger conversation, but people might only get the snippet so it needs to make sense alone.
Creating written content
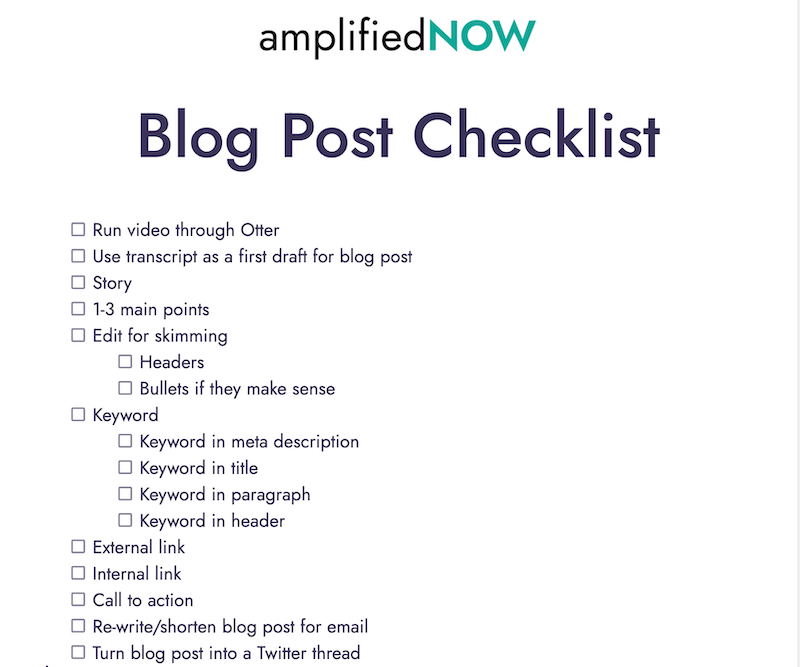
Run your final full-length video through your transcription software and ta-da, you have the first draft of your blog post!
There are so many people that don't process things on video (Emma included!) So if you stopped at just the video, you're not going to get as much reach as you can with written text.
You don't have to tell exactly the same story in written content that you did on video. The people that are watching your video and the people that are reading your content have so little overlap. The video and the blog post do not need to be identical.
You still want to tell a story, share your main points and a CTA but you don’t have to be word for word with the video. Feel free to expand in the text what you left out in your video story. Or add another point or expand the call-to-action.
Now that you realize that this transcript is just a rough draft, you are free to turn it into something great.
Add in headers and bullet points, link to external and internal resources, highlight great quotes, and add-in graphics that help explain your point.
So after you've done that first initial edit, and after you've checked through all the pieces on your checklist, let it sit for 24 hours, and then do a final edit.
After the final edit, turn it into an email. Emails are so much more succinct than blog posts. So how can you convey the same points to someone who has subscribed? What can be cut from the blog post without losing the narrative, and then what is the call to action in the email is often different, and probably not to read the blog post.
Then you’re going to turn the blog post into a Twitter thread and social media captions. Facebook, Instagram, and LinkedIn love long-form content with around 1000 characters. Twitter is 280 characters max. So pull out a combo of long and short-form copy.
Then pull out those drop the mic quotes, where you said something so pithy, so good, that you're going to pull it out and make it on a beautiful Instagram-friendly quote graphic.
Quickly, let’s talk about the point of social media. You don’t want to create all this content and just ask people to click back to the blog post. You are working to position yourself as a knowledgeable expert in your field.
You solve problems. And when the people in your network have those problems you want to be top of mind. You stay top of mind by sharing content that shows you can solve their problem on a regular basis.
This means that you don’t always need a CTA in a social media post. If it makes sense, add it in, but sometimes you are just sharing your knowledge. You don’t deal in pageviews, you do not deal in YouTube subscribers, you deal in customers and clients.
Creating graphics
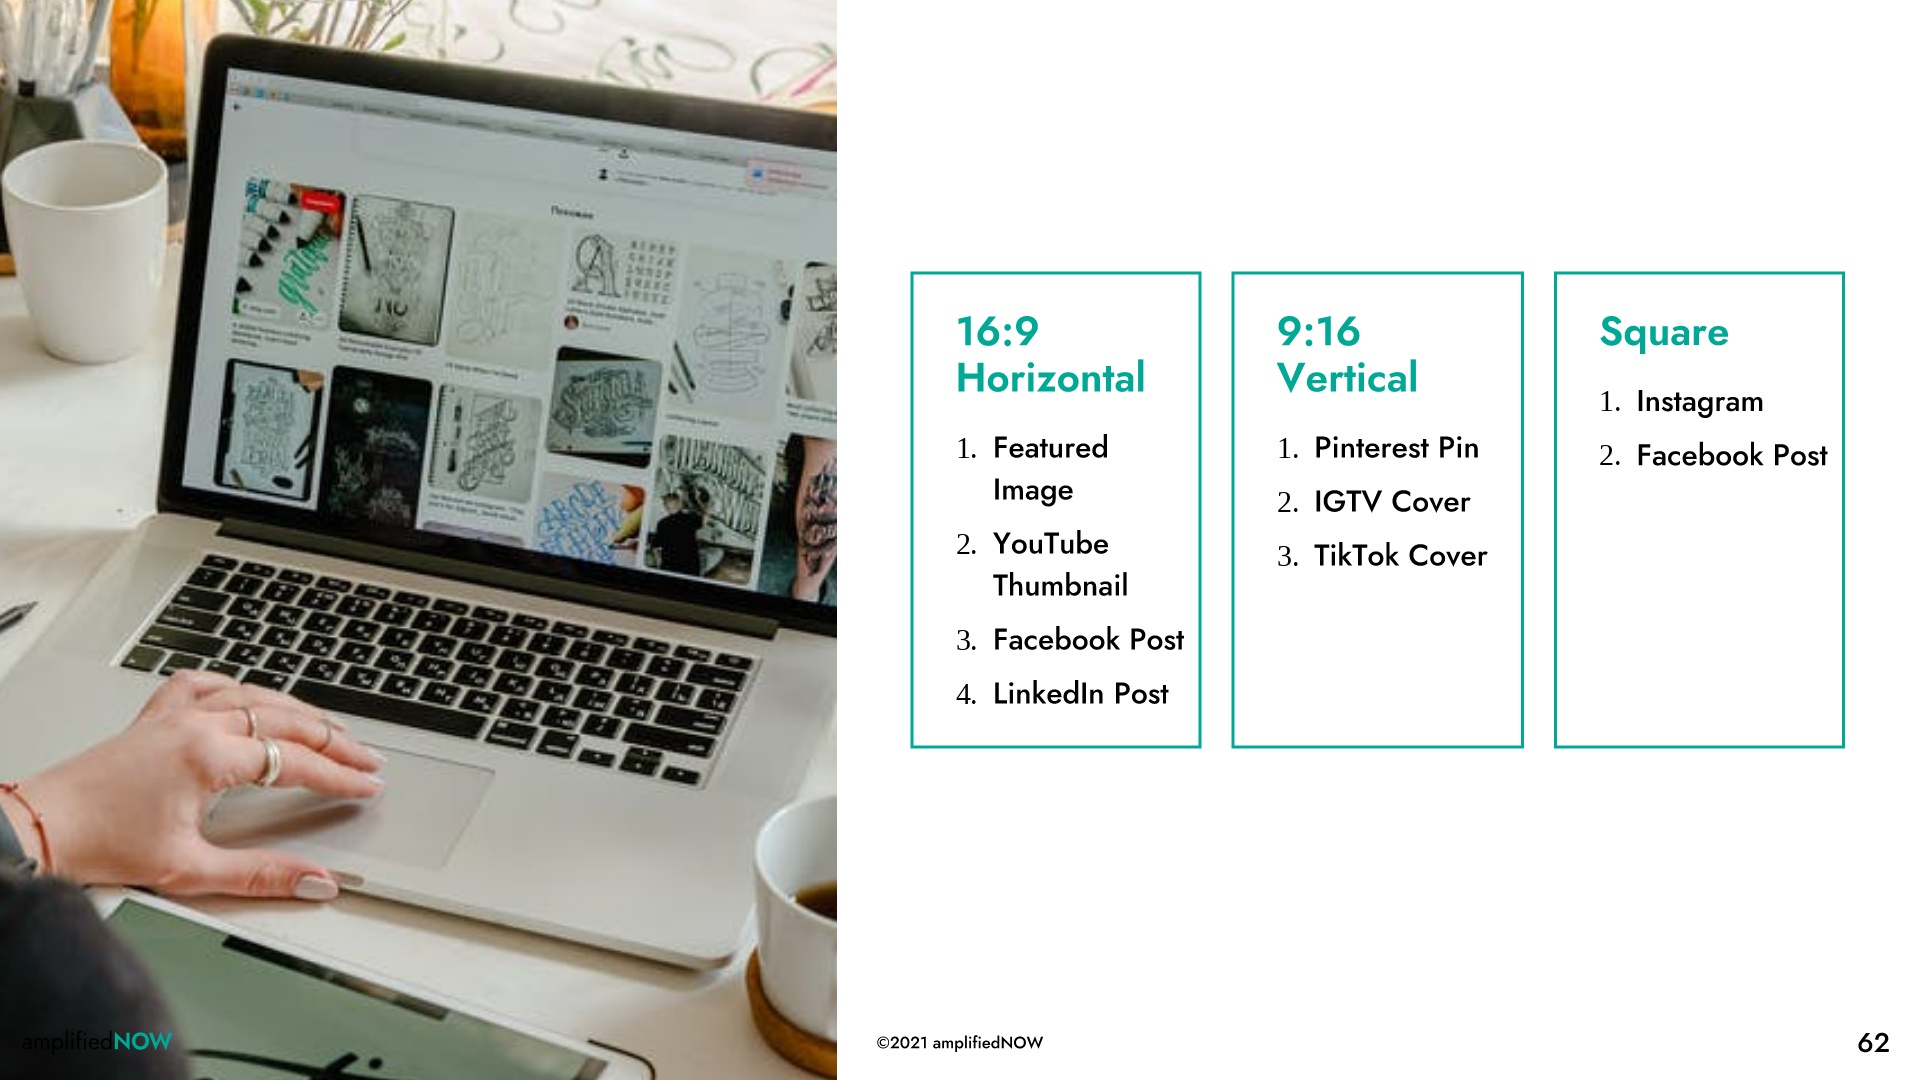
Create three templates for the three different layouts: landscape, vertical and square. It’s great to use some of your headshots on your graphics. Using your words and your photo will cement in your network's mind exactly what you bring to the table.
The horizontal, get used as a featured image in the blog post, the YouTube thumbnail, the Facebook post, and the LinkedIn post. And we want to make a note here because we recently took out one of our templates. We used to do a 1200x630 and we found that Facebook will take 1280x720 whereas YouTube won't take the Facebook size. Just make sure when you're making the horizontal image that you don't have text that goes all the way to the edge.
The vertical gets used on Pinterest, IGTV, and then TikTok. The square gets used in the Instagram feed, as in a Facebook post, and also on Twitter.
Create quote graphics for Instagram using the quotes pulled from the blog post.
You could also do this in two stages. You could put all the standalone quotes on Twitter, and then take a screenshot of those, and put the screenshot against a background for Instagram. (HypeFury does this automatically, saving you the “screenshot” step.)
And then you may be wondering what you should be using to create your graphics. We like Canva because it makes creating templates and multiple styles really easy. You pop in your client's brand colors and their fonts, and then you can create those three different templates in, you know, half an hour.
Canva Templates: Click to Download
Canva
You don't have to have a paid Canva account, but you do need to have an account set up in order to use these.
Once you click on one of these, it's going to open in a new window, then click Use Template, it's going to copy it to your account.
Here is the video on how to edit them:
Keynote
Now, we’re going to talk about how to create these graphics in Keynote.
If you're not a Mac person, fear not, PowerPoint is exactly the same. It looks different. There are some hipsters that would disagree with me, but it's the same thing.
Step Seven:
Content scheduling
We’ve gotten through the creation part, and now it's time to put those pieces out in the world.
Start with loading and formatting your blog post and YouTube video. You’ll want to embed the video in the blog post so schedule them both for the same day.
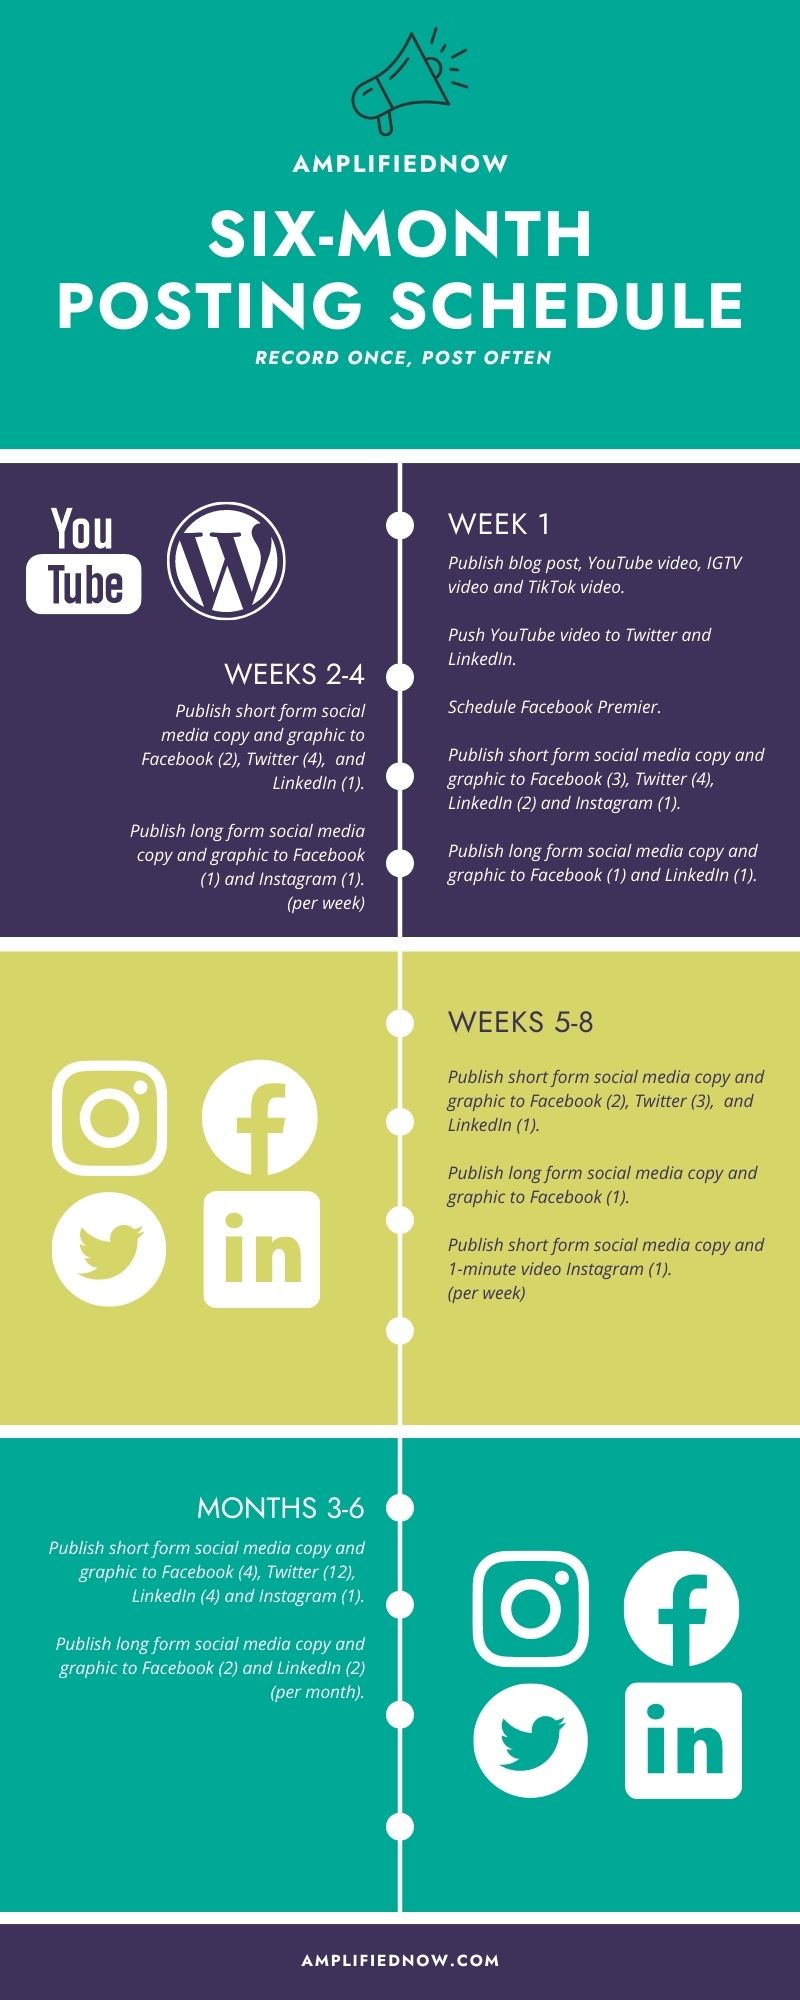
Next, you can schedule your social media posts to go out over the next six months. You can see the schedule we suggest in the graphic.
We like MissingLettr for scheduling to Facebook, LinkedIn, and Twitter. It connects to your RSS feed, pulls your blog post in, and suggests quotes. But it doesn't schedule videos to any platforms.
Facebook Creator Studio is great for scheduling your content to Facebook and Instagram feed or IGTV. You can schedule videos through there and even schedule your full-length video to be a Facebook premier.
Kathleen loves HypeFury for Twitter and Instagram. It will automatically create screenshots of your Twitter posts and push them to Instagram.
The only way to post videos to LinkedIn is to manually post them, as of this writing, they can’t be scheduled at all. Also, if you want to use your blog post as an article on LinkedIn, you have to copy and paste it manually.
Honestly, there is no all-in-one tool that we LOVE for social posting. And the truth is, there's no real way to do social media well with automation tools alone. That's partly because social media is made up of people and not robots. So, you're going to still need to manually post on some platforms and commit to being at least somewhat active on social media.
So, whichever tool you choose, you schedule your posts by mixing and matching videos, graphics, and social media copy that you pulled. Set aside time every day to handle manual posting on social media.
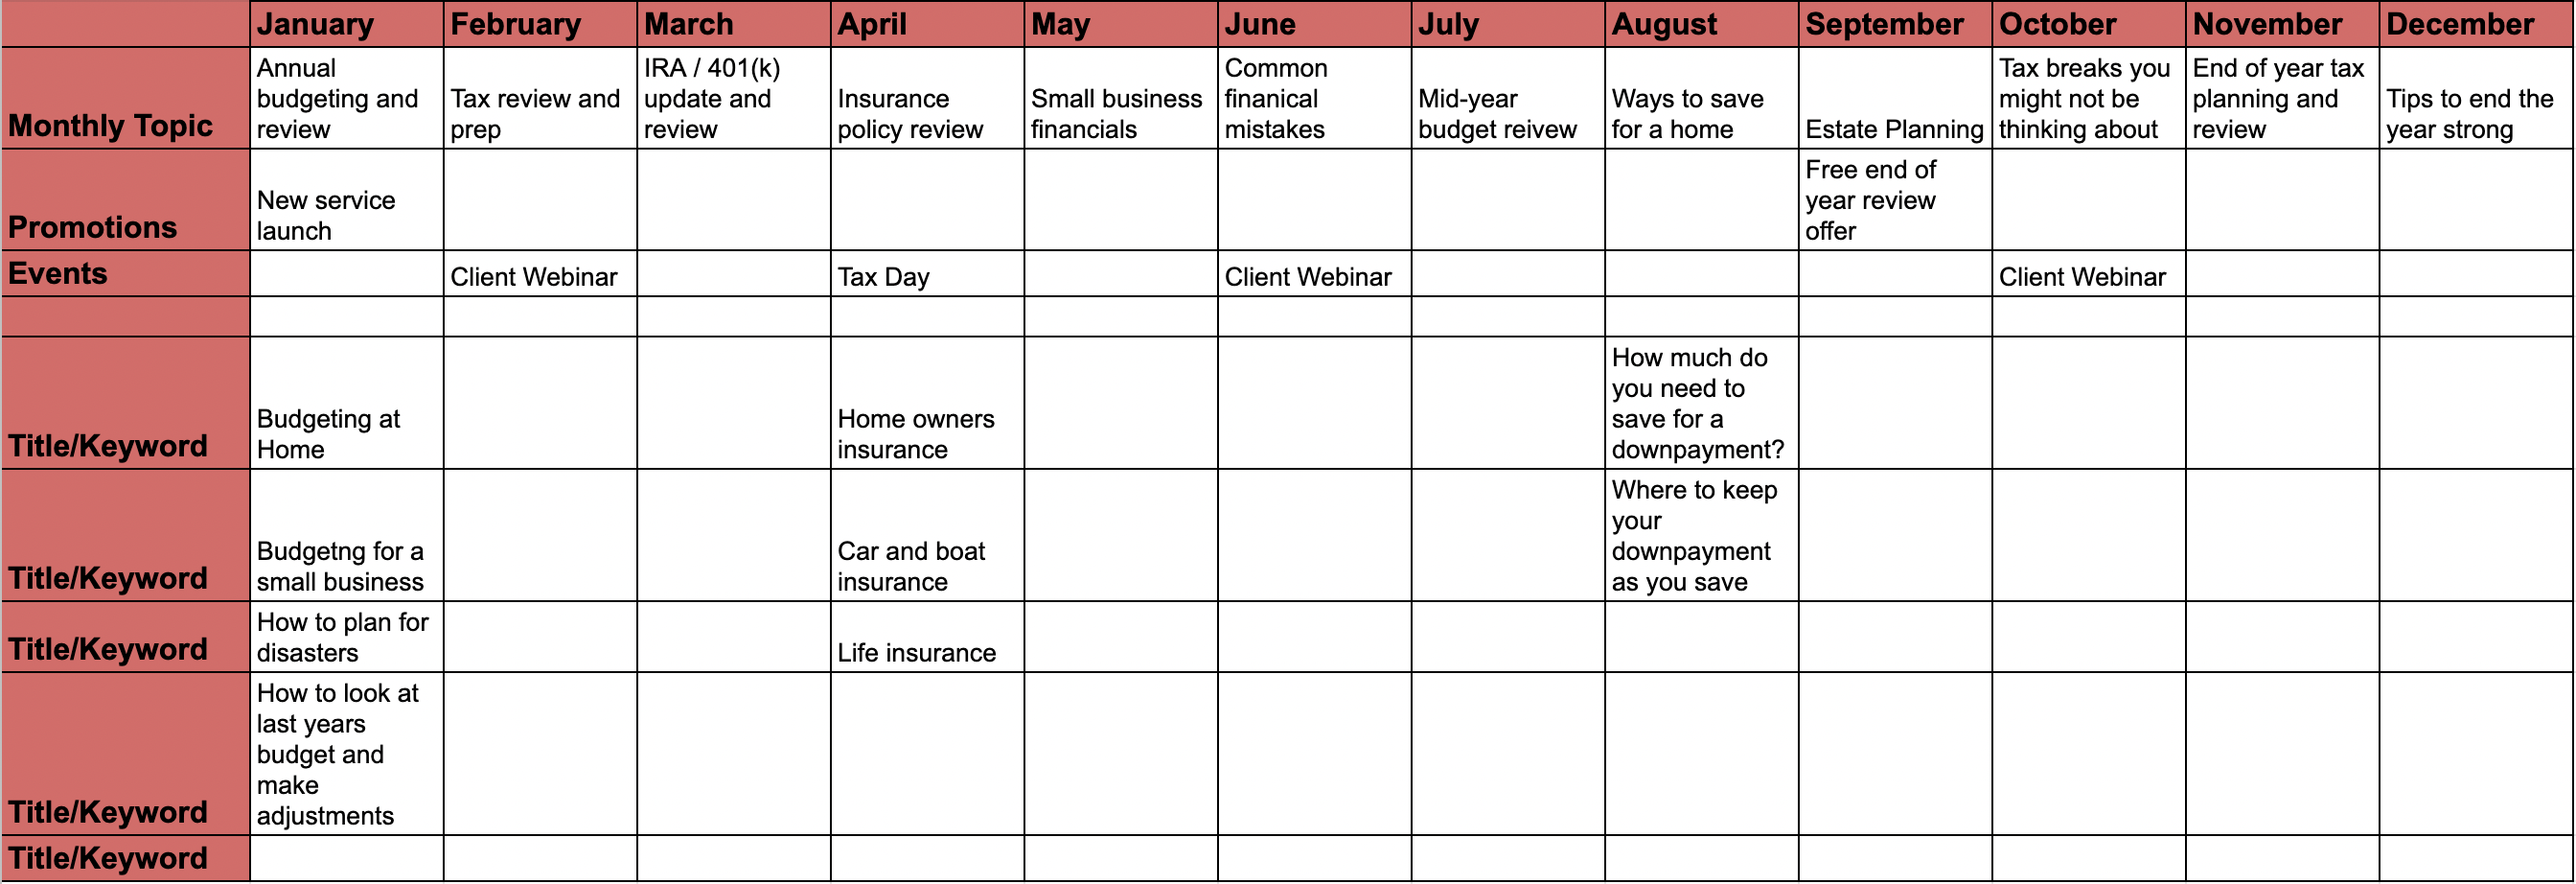
Example Schedule for a batch of content
Week 1:
- Publish the blog post
- Publish the YouTube video
- Share the video to LinkedIn and Twitter
- Publish the IGTV video
- Publish the TikTok video
- Schedule a Facebook premiere
- publish short-form social media copy and graphics/video to
- Publish long-form social media copy and graphics/video to
Weeks 2-4:
- Publish short-form social media copy and graphics/video to
- Publish long-form social media copy and graphics/video to
Weeks 5-8:
- Publish short-form social media copy and graphics/video to
- Publish long-form social media copy and graphics/video to
- Publish short-form social media copy and one-minute videos to Instagram
Months 3-6:
- Publish short-form social media copy and graphics/video to
- Publish long-form social media copy and graphics to
The problem with social media is that it is needy and incessant. The opportunity with social media is that it's great exposure and you can connect with lots of new people.
This is a supplementation to what you’re already doing. You can still take a picture of your coffee and post it on Instagram if you want to.

Step Eight:
Three Rules for Creating Content
Be consistent.
Your prospects are out there. Make sure whatever you decide to do, you can do it consistently. One post per week amplified is better than five posts in one week than nothing for the rest of the month.
Don’t rely solely on educational content.
Teach, yes. But in order to move the needle, in order to get people to align themselves with you, make sure you’re contributing SOME emotional content. Again, no need to drag up past demons, but a show of strong emotion does well on social media.
Understand that content marketing is a long game, and plan for it accordingly.
It can be ridiculously challenging to set aside time to create content every week, especially when you have client work that could expand to fill more hours than you have.
But part of the amplifiedNOW membership’s guiding principles is to create sustainable, repeatable systems that help build your client base for many years to come.
Organic traffic is but one way to do that. So commit to it, give yourself realistic expectations (NOT “if this one post doesn’t get me ten clients, I’m throwing in the towel!”), and know that the work you put in now will pay off in the long run.
